£2,315.81
11 products

Lenses
Batteries

Misc.
iPad Mini (for flat calibration frames)
£30.23
Introduction
As a beginner in astrophotography, I'm most interested in creating setups that are relatively budget-friendly, travel-friendly, and simple. At the same time, I want them to be powerful enough for years of use with great results. Below is a rundown of all necessary parts for my current build which I'm really enjoying so far!
Now, you may be wondering to yourself how $3k is considered "budget". If you spend enough time looking at astrophotography gear, you'll realize that what I've chosen here is absolutely on the less-expensive side. And this setup can actually get much cheaper than $3k (see the camera section below).
Here's an example of what you can capture with this setup:
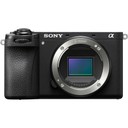
Camera
Many people already own mirrorless cams or DSLRs. Using yours as part of your setup can save a lot of money and headache. I already owned the Sony a6700, which cut the total cost of this build in half for me. If you don't own a camera, you can likely find a used or low-end one for $500 or less. That would bring the total price of this build down to $2k!
Something that is both a pro and con of the a6700 specifically is that it has an intervalometer function. Intervalometers are absolutely necessary for astrophotography (in order to take long repeated exposures and stack them for a better resulting image), and either your camera will include one in its interface or you will need to buy a handheld one. The downside is that Sony's intervalometer function only goes up to 30 seconds.
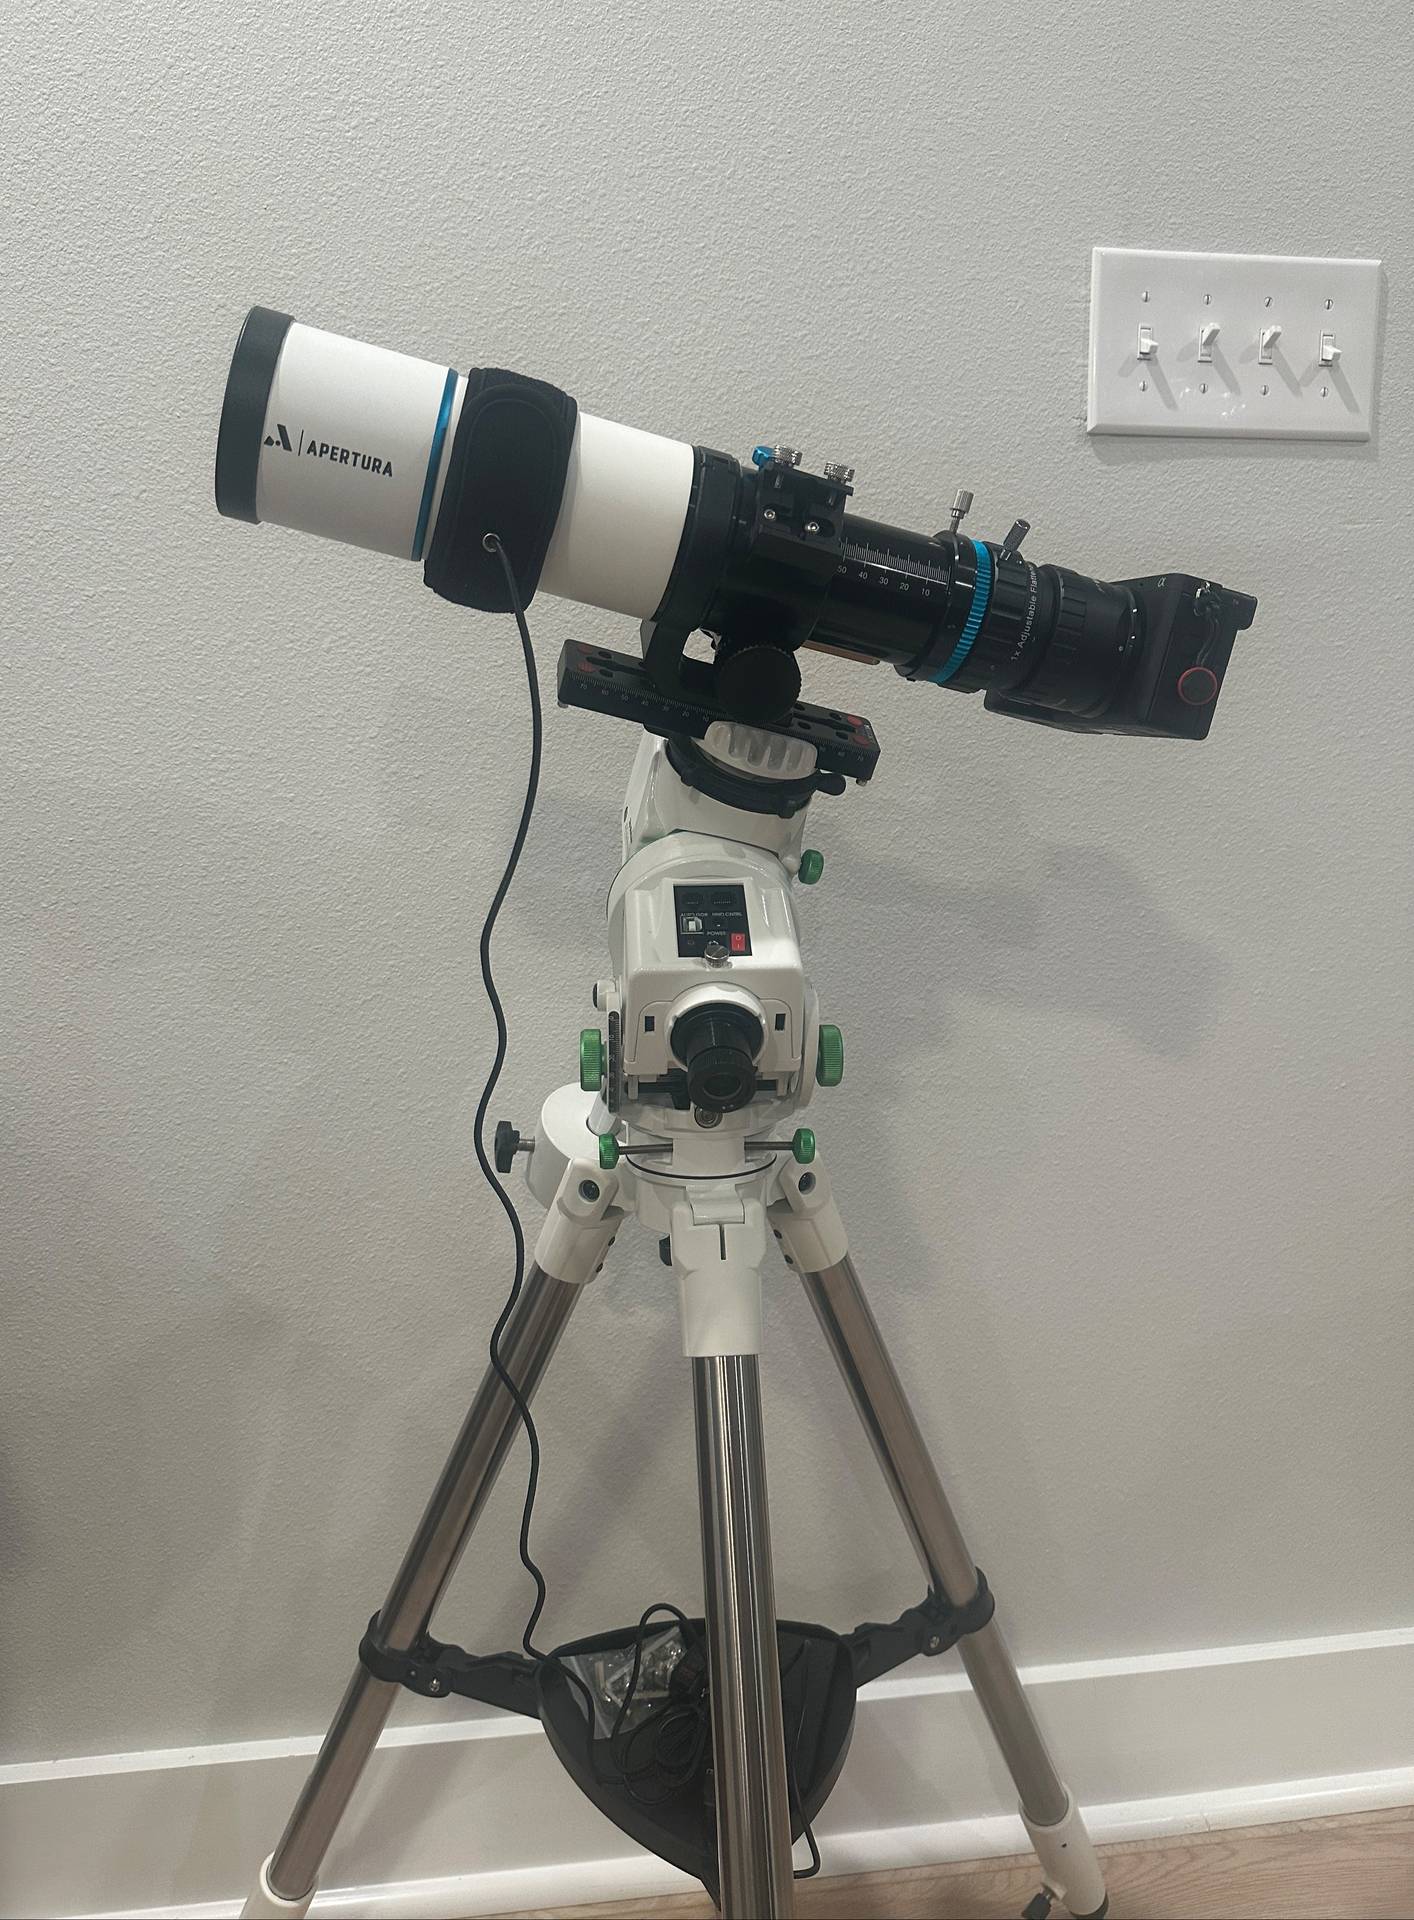
Telescope & Accessories
Choosing a telescope or lens was the most difficult part of this process for me. If you already own a lens, you can certainly try to get good use out of it before buying something new. But I wanted to get deeper-space images, and it just didn't seem like my 70mm focal length would do the job.
On my search to find a high focal length budget lens, I was surprised to find out that buying a refractor telescope could actually be thousands of dollars cheaper. Why is that the case? My best guess is that since refractors are specifically designed for the night sky, they cut down on some things that may be necessary in a more general-purpose camera lens.
Anyway, I ultimately landed on the Apertura 60mm Doublet Refractor with 360mm focal length. Doublet refers to its two lenses; triplets are generally more preferred but also more expensive and less lightweight. This purchase also included a field flattener, which helps remove distortion around the edges of the image.
I also picked up a T-Ring which is necessary to mount the camera to the refractor telescope (via the field flattener). If you buy one yourself, make sure it's the correct width and for the correct camera mount. The Apertura 60mm refractor accepts an M48 T-Ring, but M42 is more common.
And to prevent condensation from forming on your lens of choice, a dew heater is extremely helpful. They are very cheap as well; the one I chose was $20.
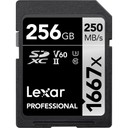
Storage
A 256 GB memory card seemed to be more than enough for what I need.
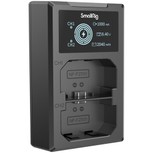
Batteries
The a6700 came with an NP-FZ100 battery, so I excluded it from the above part list. But a charger was a necessary separate purchase, and luckily only $11. The below mount system also requires power, and 8 AA batteries will do the job and keep it portable.
Tracking Mount
The star tracker / equatorial mount is often considered the most critical component of an astrophotography rig. The choice here really just came down to budget, and the Star Adventurer GTi is actually relatively cheap. If you need something even cheaper (around $100-200 less), a Star Adventurer 2i Pro will also work but with less features. GoTo functionality is one of the GTi's key selling points; it means you can select celestial objects for it to point toward and track automatically.
To mount the telescope & camera to the GTi, a dovetail plate is necessary. I originally bought an SVBONY plate () but quickly realized that the protruding sides on top made it impossible to mount my refractor. To this day, I still don't understand how you're supposed to use that product. The YUEOCT plate I purchased afterward immediately worked.
Light Panel
Calibration frames are critical for reducing noise in astrophotography. There are three major types of these, one being flats. TLDR; flats require a bright, uniform light over the refractor/lens. Many people use cheap "light pads" (originally for drawing), but I couldn't find any information on how you could power one in a portable way. Luckily, I was able to find an old used iPad Mini on Facebook Marketplace for only $20 more than I would've spent on the light pad. Portable and still quite cheap! Some people can get away with just using their phone screen for flats, but mine just wasn't wide enough to cover the front lens.
Transport & Protection
I'm still considering options for how exactly I want to take this setup with me when I travel. For now, I've left the whole rig mostly assembled in my house so I can look at and admire it (lol). But I'll likely want to take it on a plane ride later this year. This may be a bad idea, but a $0 transport option I'm considering is individually wrapping everything in small towels and t-shirts, then stuffing it all into a backpack. This fits everything except the star-tracking mount's included tripod and counterweights. I could then keep the backpack as my personal item and check the tripod and counterweights in their shipping box. I'm not entirely sure how realistic this idea is though.
The other option would be to buy some dedicated bags/cases. Will also need to research this.
Future Upgrades
I really want to focus on keeping my kit portable and budget-friendly, but the final thing I'll eventually look at adding is a guiding system. Guiding helps improve the accuracy of tracking over long exposures. The Apertura refractor came with a guide scope, but the other component I'll need is a computer. The ZWO ASIAIR seems to be a pretty universally-loved option. But for now, I'm going to hold off and see what I can accomplish without a guiding system.